Archives For Nursery

I realize I’ve been writing a lot about the kid this week. As the primary agent of chaos in our household he seems to be at the center of my efforts to declutter and organize. Today: the toys. We try to keep his toys simple and streamlined, and yet still they multiply. My strategy thus far has been to keep them corralled in baskets and bins, but as more experienced parents have probably already learned that is just not going to work. I feel like he doesn’t play with most of what he’s got-probably because he’s overwhelmed by seeing them all jumbled together like that-but somehow they end up scattered all over the floor every day anyway. So I decided to conduct an experiment with the toys in his room to see if that Maria Montessori was onto something.

005 (570x380)

The Montessori philosophy on toys is that they should be stored on low shelves that are accessible to the child. My girl Maria believed that even babies can appreciate aesthetics and that their play areas should be orderly and attractive. Kids should be able to see what toys are available and easily pull them out and put them away (uhhhh, we’re still working on putting them away).

009 (570x377)

I got these low shelves for only $10 at Target! They’re not sold online, but you can see them here. They also come in a 31″ width for $13. I was originally going to stack them in his closet (they come with pegs and wall brackets to safely stack them) but they were just a smidge too wide. It’s just as well because I actually really like them in this corner that was previously filled with clutter (now neatly organized in the closet).

013 (570x372)

I went around the house and chose toys that I thought would work well. They’re mostly his favorites but a few things that he hasn’t really noticed much before are there too. I was amazed at how much fit on these two small shelves! Without even crowding them I was able to fit sixteen toys (including a plastic cup from our favorite taco shop that he’s obsessed with) and a low basket full of board books. I mean, I feel like this is all the toys a kid could possibly need. All the toys strewn across the rest of the house are just lagniappe.

Next I’d like to develop some system of rotating his toys so that he stays interested in what’s out, but I haven’t worked out all the logistics yet. Any ideas? Thanks for reading, y’all, and I hope you have a fabulous weekend!

Share

More than a year after embarking on this gig called motherhood I am still struggling with the task of keeping my little man organized. Poor Nick can’t keep up with all the new systems I put in place to try to streamline the clothes, the toys, the diaper bag, etc. We’ve reached a breaking point and I am on the verge of a big purge. The guest room is packed with piles of stuff I need to sort through to store or donate, but before I tackle it I want to make sure I’ve got everything in his room exactly how I want it. No sense in storing away all those outgrown clothes only to find something I missed at the bottom of a drawer, right? Leave it to the perfectionist in me to rationalize why I should be making cute closet dividers instead of sorting through the pile of crap in the spare room.

The closet dividers are necessary because until recently we’ve kept the majority of Jack’s clothes in his dresser. I don’t know why I ever thought that was a good idea. Especially as we move into the unpredictable fall/winter, I need to be able to see his clothing without rifling through piles. It’s not at all uncommon in Louisiana to be bundled up in October but wearing short sleeves on Christmas, so bring able to assess what’s warm and what’s not at a glance is key. The second problem is that I have had a hard time to date with keeping track of what’s almost too small, what fits just right, and what’s not yet grown into. Enter the closet divider. There’s a vast selection of cute ones on Etsy and The Container Store has some blank ones for only .99 each, but with no Container Store near me and no patience for waiting for shipping I decided to make some myself with supplies already had.

I’ve got a huge stack of these blank CD’s that I bought years ago because I needed just one. I feel certain I’ll never use them all, so I didn’t mind sacrificing a few to the cause. If you don’t have any CD’s you don’t mind ruining, you could use cardboard, foam core, or even thick cardstock instead.

055 (570x380)

I used a set of wire snips to cut a slit at the bottom, then a circle from the center. If you don’t have wire snips some sturdy scissors or some sort of scoring tool may work even better.

056 (570x380)

058 (570x380)

The metallic film came off in large chunks under warm running water, then I used a magic eraser to scrub away the blue-green coating and any bits of foil that remained.

061 (570x380)

065 (570x380)

With the plastic all cleaned up, I used a nail file to smooth the edges that I’d cut. I’m not trying to win any beauty pageants here; I just wanted to remove any bits that might scratch me.

068 (570x380)

I repeated this process on three disks, then used scrapbook letters to label them with the three sizes that are most relevant to us right now-the size he’s growing out of, the size he’s currently in, and the next size up.

078 (570x380)

AND THEN I flipped them over and labeled the reverse with the next three sizes. When he completely outgrows all his 12 month clothes I’ll steal the 2 (I ran out of 2′s on my sheet of scrapbook letters), stick it next to that T, and put it at the other end of the closet to be 2T. Likewise, 18 months will become 3T and 24 months will become 4T. Genius, no?

073 (570x380)

Here they are in his closet! I’m pretty sure this system will be easier for Nick to keep up with than “the ones I like best go on the right side of the drawer, the ones that are kind of ugly but I need for when I’m behind on laundry go on the left side of the drawer.” If he can just read the labels and put them in the proper sections I can pick out what’s cute/weather appropriate easily and also see when it’s time to go ahead and pack away that outgrown size. Here’s to hoping.

081 (570x380)

If you have any tips for managing the chaos of kid clothes pleeeaaassse share. I’m drowning in hand-me-downs to-be-handed-downs.


Share

Let me just put this out there: Jack was a lot easier to deal with when he couldn’t move around. I could just plop him on a blanket, he’d sit there and play, life was good. Now he is so inquisitive and into everything and I feel like I’m on constant suicide watch. Saving him from himself is exhausting.

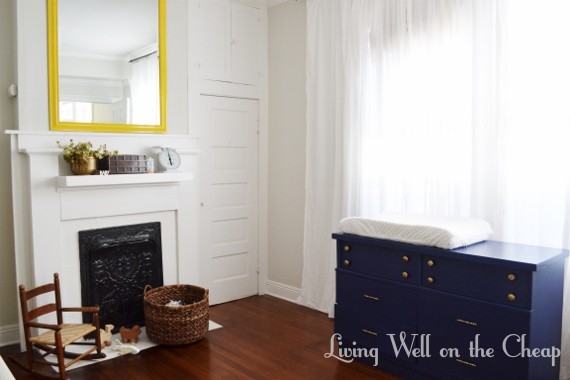
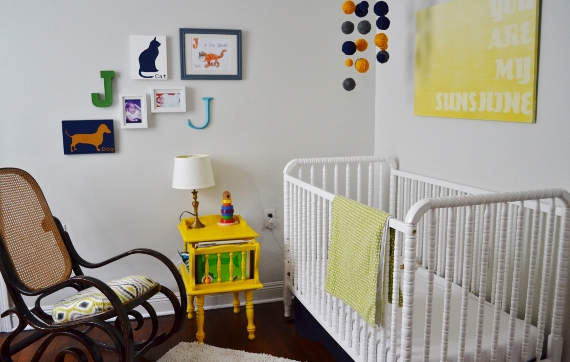
Alas, I just cannot bring myself to surrender quietly to turning my home into a totally babyfied environment. Grownups still live here and, actually, we pay the bills, so the place should be attractive and functional for us as well. Necessity + limitations breed creativity and I’ve spent the last several months coming up with creative ways to make our home safe and comfortable for all ages. Exhibit A: cords. Maybe all toddlers are into cords, maybe it’s just my kid, but it’s a problem. He wants to chew on them, wrap them around his neck, etc. I try to hide as many as I can behind furniture or whatever but the lamp and baby monitor in his room were really giving me a run for my money. I was so proud of myself when I came up with this solution. First, I stuck the monitor to the wall behind his crib with a command strip. He can’t reach it unless we move the crib and it can be easily removed and replaced to bring with us when we travel out of town. Next I used painter’s tape to secure the cords to the wall. Stay with me here.

036 (570x380)

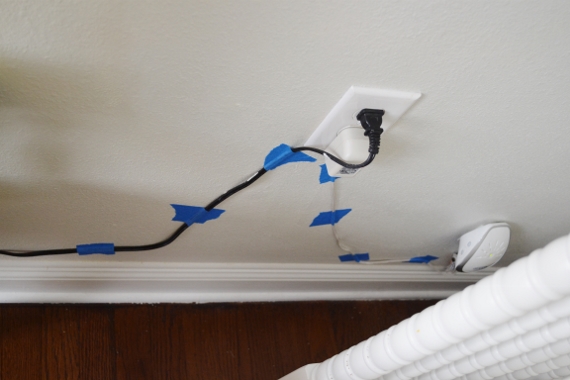
This is where the magic happens. I painted over the cords and tape with leftover paint from the walls. Jack’s no dummy and I’m sure he could spot these cords if he was really looking and of course he could go all toddler-hulk and rip them off the walls, but my suspicion that out of sight = out of mind seems to be holding true so far. Making the cords less obvious was all it took to make him forget about them.

056 (570x362)

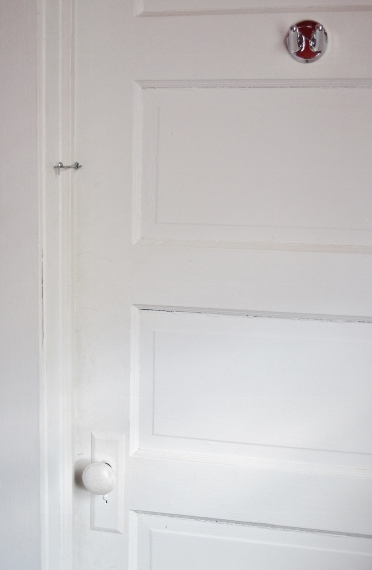
Next problem: old doors don’t close. Before Jack became so obsessed with toilets I used to lock him in the bathroom with me so I could shower. The only problem was that the door in our master bath not only doesn’t lock, but actually doesn’t even latch closed. So I installed a hook and screw eye on the door. I’ve since used this technique on several doors I needed to toddler-proof, like the closet where we store all of our tools and clutter. I have one on the tiny door to our attic as well but it’s within his reach and he’s figured it out.

156 (372x570)

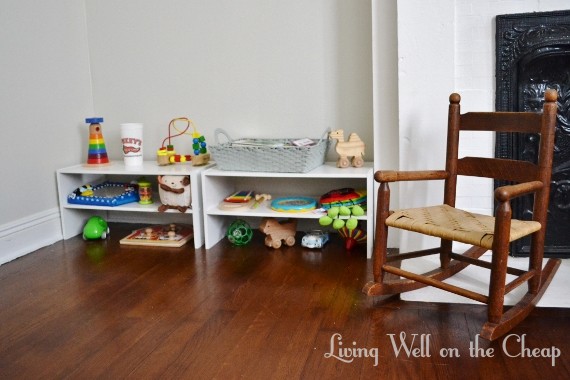
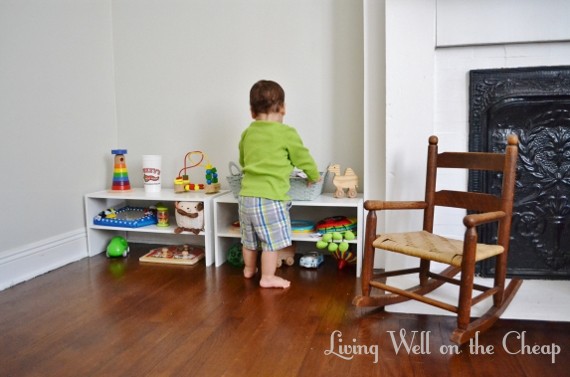
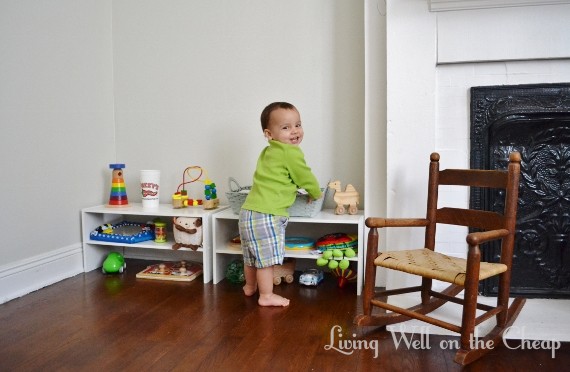
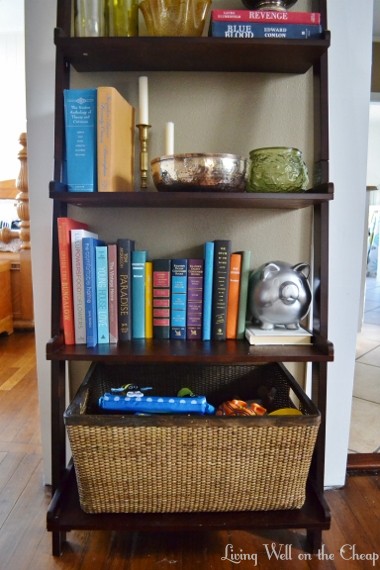
I’ve posted about this shelf before but it bears mentioning again. I put a big basket on the bottom shelf full of Jack’s toys and honestly he hasn’t messed with anything else on the shelf since, but just to be safe the second and third shelves are full of books (obviously unbreakable) and items stuck down with museum putty. I was so excited when I discovered this stuff. I use it to secure lamps, whatnots, etc. so that cats and babies can’t knock them down. Works like a charm.

babyproofed bookshelf

Last but not least, the baby gate. Ugh, I was so hoping to avoid them altogether but reality had other plans. Jack can and will scale those stairs at any available opportunity so they must be barricaded during all waking hours. I was happy to at least find one that was both inexpensive and on the attractive end of things. And it’s made of sustainable materials so I can pat myself on the back for that. (if you’re in the market for baby gates this is the one we own and love).

159 (380x570)

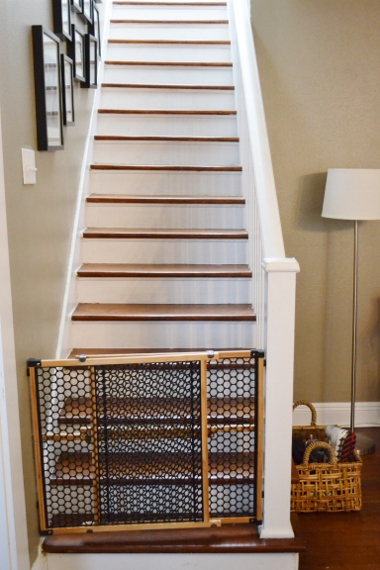
Jack is also really into the dog’s food and water bowls. It took me weeks to figure out how to keep him away from them without blocking the dog as well, but finally I got the idea to just mount the baby gate a foot or so off the ground. Jack probably could crawl under but he doesn’t know it and I plan to keep it that way. I used to just block him out of the laundry room behind the kitchen (where we keep the dog bowls, cat litter box, etc.) but I recently started blocking him from the kitchen after he learned how to turn on the gas stove knobs and it’s a brave new world. It’s so much easier to cook without a toddler underfoot.

169 (380x570)

I was talking to my friend Cassie the other night about how our babies have changed our lives and she repeated something she’d heard from someone else; to paraphrase: they’re not just an add-on. The entire landscape of our lives shifts to accommodate them. And for Nick and me negotiating the new normal in a post-Jack world has been fascinating, exciting, painful, frustrating, and unexpected in so many ways. We’ve had to figure out everything from how we spend our free time to who changes diapers on the weekends to a daily routine that keeps everybody fed, clean, and happy. Is having a cute house the most important thing in the world? Obviously not. But it helps me keep a little bit of my identity in a world that’s dominated by sippy cups and snack times.

Do y’all have any tips for keeping some semblance of sanity in a home with small children? My number one tip is to get a dog-Juliet happily cleans up every crumb that falls to the ground. And my newest thing is to sing the clean up song while picking up Jack’s toys before naps and bedtime. I notice that he is actually more interested in them when they’re not all sitting out all the time and I’m hoping that as he gets older he’ll start joining in with putting them away.

Share

My home has really started to come into its own over the past year. It feels like everything is filling out and settling in and the effect is really delightful. There’s still work to be done, for sure, but as things come together I’m trying to stop and look around and take stock of what works and what doesn’t. One thing I’ve noticed is that nearly every room has at least one special thing-an element that’s a little odd and unexpected and seems to speak directly to my heart.

In the bedroom, it’s the birdcage. I feel like I’m struggling with this room overall (more on that later this week maybe), but this corner is perfection.

The item I get the most comments on when people visit in person is the book page wreath in our living room. I made it before I started my blog so sadly I cannot link to a tutorial for how I made mine, but I was inspired by this. And in case you’re a bibliophile whose heart is breaking at the thought of book destruction, perhaps it will bring you some comfort to know that it was constructed entirely from airport paperbacks. No classic literature was destroyed in the making of this wreath. Most of it is a Nicholas Sparks novel.

If I were buying it today, I might be too scared to pick chartreuse for an investment item like a stand mixer. But when I was pooling all the Target gift cards we got from our wedding to put towards one it didn’t seem like such a bad idea. I’m glad I went for it, because four years later I’m still happy (and if I do get tired of it someday I can try painting it with epoxy).

I first spotted this peacock in my friend Cassie’s apartment years ago and I wanted it instantly. When she was ready to say goodbye he came to live with me! It’s a fun touch for a very classic-looking fireplace.

The mannequin leg is another one I’ve had for a long time, but it didn’t reach its full potential until I filled it with flowers I’d made from book pages and wire (more literary destruction! I like reading, I promise!). I bought the leg from ebay when I was still in college after I’d seen a leg lamp (a la A Christmas Story) in a friend’s apartment and decided I had to have one. I never made the lamp, but the leg is fun all on its own.

leg vase

Even though it’s an architectural element and not something I brought in, the original-to-the-house fireplace is maybe my favorite part of the nursery. It’s just so unexpected and, in my opinion, endlessly charming. It’s inoperable so the summer cover stays on year round.

fireplace

And the most recent addition to my list of true loves is this skirted counter in the laundry room. For three and a half years that corner was the ugliest spot in our house, and now it’s quite possibly the most charming. I’m planning on adding more plants and other pretties in the coming months.

The thing about each of these elements is that none (except for the mixer) were pricey “investment” pieces. In fact, I paid very little out of pocket for each of them! I used gift cards for the mixer, built the wood counter myself and skirted it with fabric I found on sale, made the book page wreath from materials I already had. The mannequin leg was an ebay find and the peacock and bird cage were gifts (thought I think both came to the gift-givers secondhand, and in the case of the birdcage my mother-in-law found it at a thrift store). My point is that you don’t have to spend a ton of money at Anthropologie or wherever to find fun, unique decor that speaks to you. You just have to be patient and open your mind to new ideas!

I hope you all had a lovely weekend! Ours went by way too fast but was oh so wonderful. Back to real life!

Share