Archives For Living Room

I’ve been moving some things around lately. You see that green floor lamp in this photo? I never thought it looked quite right there. In fact, it felt a little like it belonged in a dorm room.

5 living 2 (570x380)

Then we have this floor lamp in the dining room. If you were sitting beneath it on the sofa while it was on it felt very much like an interrogation. And many folks bumped their heads on it while getting up.

But hark! Look how nice it fits in right here in the living room. And because the chaise lounge is specifically designed for one-direction seating the lamp is safely positioned over the knees, rather than the head. I’ve been sitting here reading in the evenings and the light is just perfect.

That whole dining room situation is getting switched up. Just you wait and see! It looks like a hot mess right now but I’m cool with it. Isn’t it fun how sometimes you can get that same thrill of finding something great just by shopping your house? I mean, this feels like a brand new lamp to me. We rarely used it before but now it’s my favorite.

I hope you all had a great weekend! I did some studying, some craigslisting, some estate sale shopping, some baby snuggling, some burrito eating, some neighborhood walking, some porch swinging, and some beer drinking. Can’t beat that with a stick.

Share

My home has really started to come into its own over the past year. It feels like everything is filling out and settling in and the effect is really delightful. There’s still work to be done, for sure, but as things come together I’m trying to stop and look around and take stock of what works and what doesn’t. One thing I’ve noticed is that nearly every room has at least one special thing-an element that’s a little odd and unexpected and seems to speak directly to my heart.

In the bedroom, it’s the birdcage. I feel like I’m struggling with this room overall (more on that later this week maybe), but this corner is perfection.

The item I get the most comments on when people visit in person is the book page wreath in our living room. I made it before I started my blog so sadly I cannot link to a tutorial for how I made mine, but I was inspired by this. And in case you’re a bibliophile whose heart is breaking at the thought of book destruction, perhaps it will bring you some comfort to know that it was constructed entirely from airport paperbacks. No classic literature was destroyed in the making of this wreath. Most of it is a Nicholas Sparks novel.

If I were buying it today, I might be too scared to pick chartreuse for an investment item like a stand mixer. But when I was pooling all the Target gift cards we got from our wedding to put towards one it didn’t seem like such a bad idea. I’m glad I went for it, because four years later I’m still happy (and if I do get tired of it someday I can try painting it with epoxy).

I first spotted this peacock in my friend Cassie’s apartment years ago and I wanted it instantly. When she was ready to say goodbye he came to live with me! It’s a fun touch for a very classic-looking fireplace.

The mannequin leg is another one I’ve had for a long time, but it didn’t reach its full potential until I filled it with flowers I’d made from book pages and wire (more literary destruction! I like reading, I promise!). I bought the leg from ebay when I was still in college after I’d seen a leg lamp (a la A Christmas Story) in a friend’s apartment and decided I had to have one. I never made the lamp, but the leg is fun all on its own.

leg vase

Even though it’s an architectural element and not something I brought in, the original-to-the-house fireplace is maybe my favorite part of the nursery. It’s just so unexpected and, in my opinion, endlessly charming. It’s inoperable so the summer cover stays on year round.

fireplace

And the most recent addition to my list of true loves is this skirted counter in the laundry room. For three and a half years that corner was the ugliest spot in our house, and now it’s quite possibly the most charming. I’m planning on adding more plants and other pretties in the coming months.

The thing about each of these elements is that none (except for the mixer) were pricey “investment” pieces. In fact, I paid very little out of pocket for each of them! I used gift cards for the mixer, built the wood counter myself and skirted it with fabric I found on sale, made the book page wreath from materials I already had. The mannequin leg was an ebay find and the peacock and bird cage were gifts (thought I think both came to the gift-givers secondhand, and in the case of the birdcage my mother-in-law found it at a thrift store). My point is that you don’t have to spend a ton of money at Anthropologie or wherever to find fun, unique decor that speaks to you. You just have to be patient and open your mind to new ideas!

I hope you all had a lovely weekend! Ours went by way too fast but was oh so wonderful. Back to real life!

Share

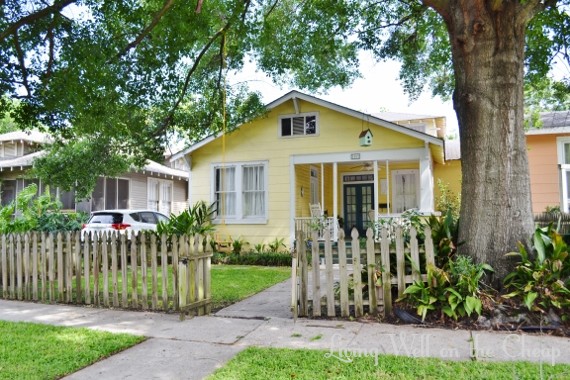
The last time I remember updating most of the pictures on our House Tour page is over a year and a half ago! That is way too long! So much has changed since then and I was kind of embarrassed to have all those old pictures on display for new visitors checking out my blog. So, since I had the house and yard looking nice for the baby shower I hosted recently, I thought I’d take the opportunity to get some fresh photos of this little place we call home. Behold: the view from the street.

1 front exterior (570x380)

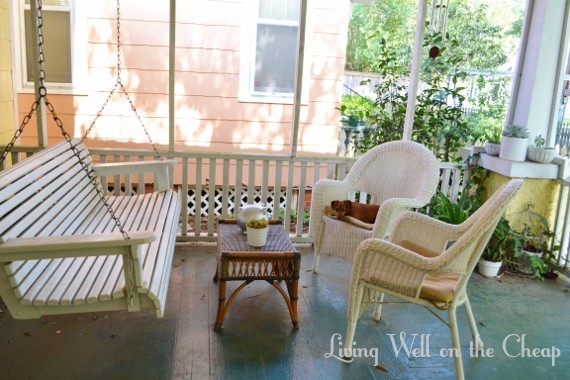
The front porch. Somebody needs to sweep that floor! It’s not gonna be me. I want to paint the floor gray but I’ll probably never get it clean enough to paint.

2 front porch 1 (432x570)

Nick and I can be found sharing a beer out here at least a couple evenings each week. He listens to LSU baseball on the vintage radio and I read a magazine or play around on my phone. There’s a ceiling fan to combat the heat and that sweet olive planted just on the other side of the railing perfumes the whole area in late summer. I’d like to plant a whole row of them eventually to create an open screen between us and the neighbors.

3 front porch 2 (570x380)

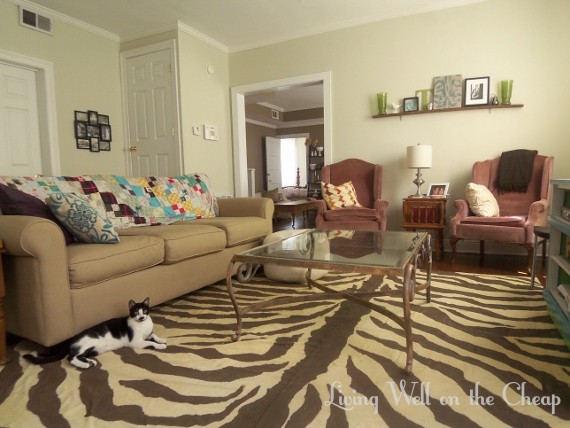
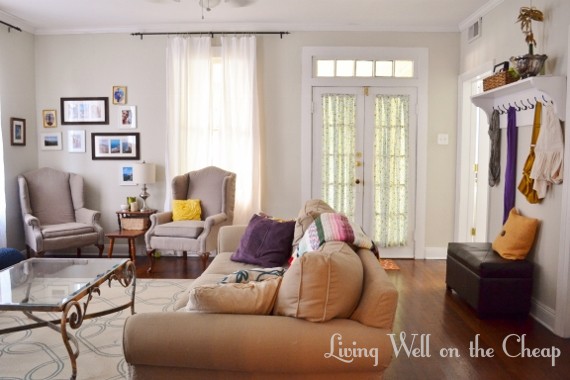
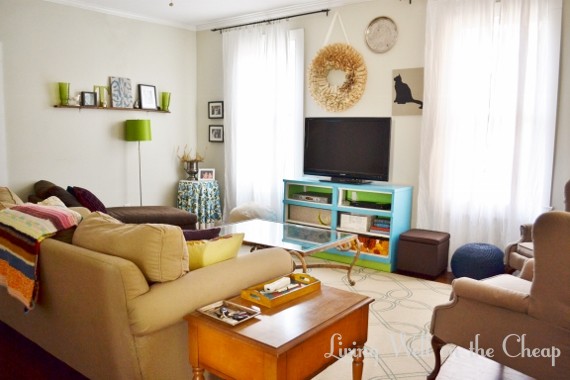
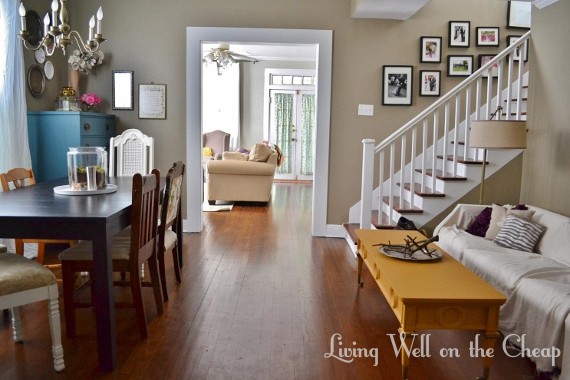
The front door opens right into the living room. I created an entryway of sorts using an upholstered storage bench and a shelf with hooks.

4 living 1 (570x380)

5 living 2 (570x380)

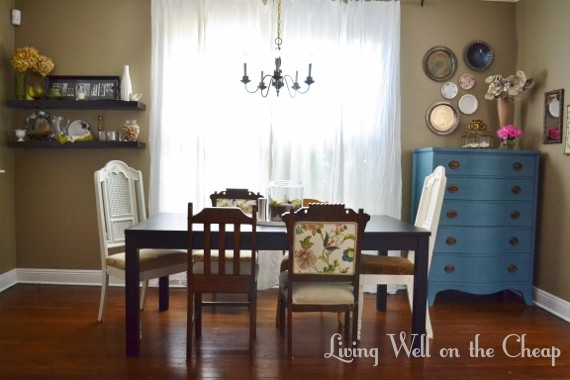
The living room opens into the dining room, which I’ve divided into two spaces for eating and sitting. To be honest, we rarely use that seating area and I’d love to someday replace it with an upright piano and a cushy rug for Jack to play on while I work in the kitchen.

6dining 1 (570x380)

I love the dining area. We have a portable high chair that we strap onto one of the dining chairs for Jack.

7 dining 2 (570x380)

The kitchen is pretty much exactly the same as the day we bought the house. I changed the window treatment and added the stemware rack under the cabinet, but that’s it.

8 kitchen 1 (570x380)

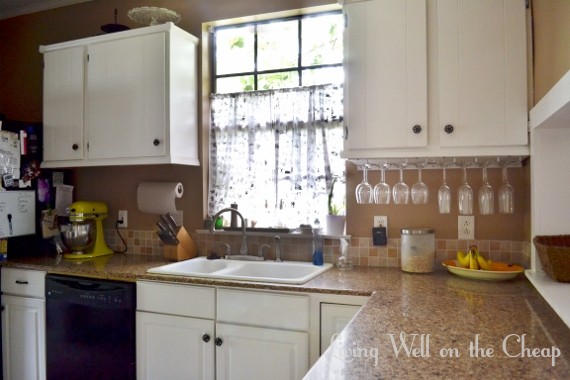
I’d love to someday replace the tile backsplash with beadboard and install upper cabinets or open shelves on either side of the stove vent.

9 kitchen 2 (570x380)

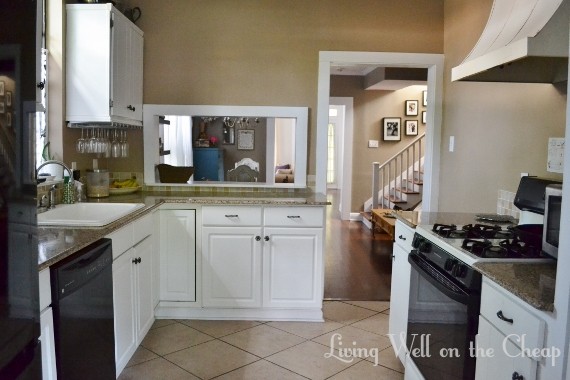
If I had a million dollars I’d also look into opening up that pass-through to expand up and to the right, creating a bar that we can pull up stools to on the other side. It’s hard to put into words but I can envision exactly what I want.

10 kitchen 3 (570x380)

The laundry room is at the way back of the house behind the kitchen. There’s a door just to the right of this photo that leads to the backyard. The washer and dryer are ancient and dying but we’re making them work as long as possible.

11 laundry 1 (380x570)

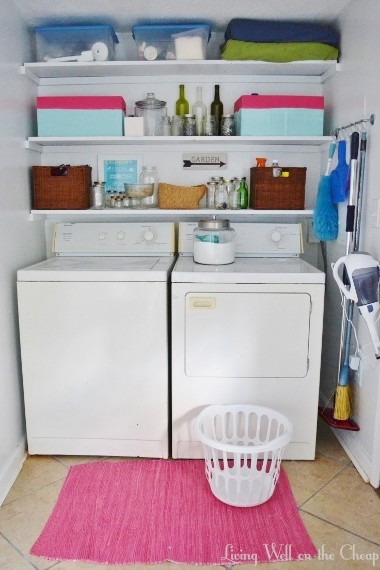
On the other end of the laundry room, I built that skirted counter to hide the cats’ litter box and a bunch of other random crap. It’s really one of my favorite projects. The dog and cat food are in glass canisters on top of the dresser and the trashcans on the right are labeled with chalkboard paint for trash and recycling.

12 laundry 2 (415x570)

I didn’t bother with an updated photo of the guest bath as it really hasn’t changed much, but here’s the old one for continuity’s sake. I recently ditched the cork bathmat and am still on the hunt for the perfect replacement.

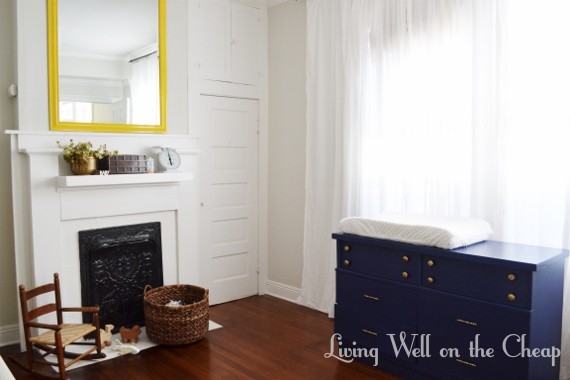
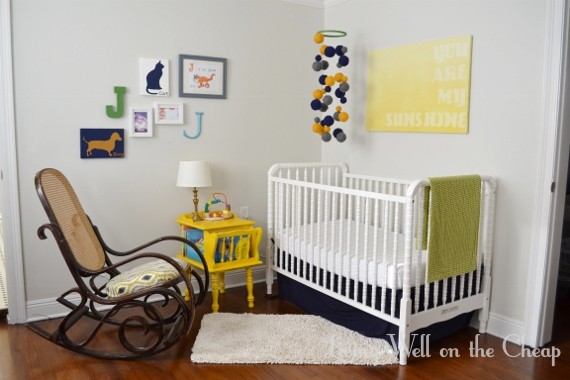
Jack’s room. The only thing I’ve changed since he was born is adding more art and accessories we received as gifts.

13 nursery 1 (570x380)

14 nursery 2 (570x380)

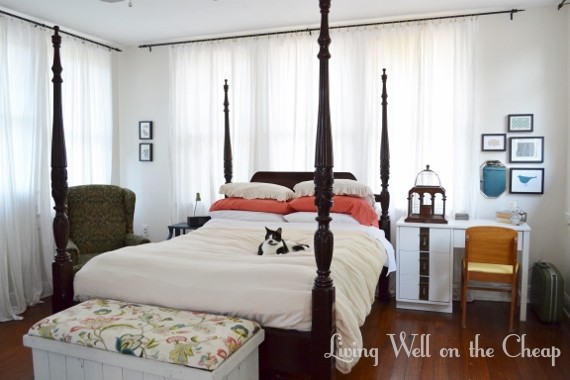
Our bedroom is upstairs. It’s sort of a loft setup. I think it was added after the house was built, but long enough ago to have the same style windows. It’s a large room and difficult to capture on camera without a wide-angle lens.

15 mbr 1 (570x380)

16 mbr 2 (380x570)

Back downstairs at the very front of the house is the office slash playroom. I’m trying to simplify things by just calling it a den but I can’t get my mouth to say it. I always just call it the office. This room and the laundry room are definitely the ones that have changed the most in recent months. It’s come a looooooong way from this.

17 office 1 (570x380)

This is where I sit blogging at this very moment. I use those shelves to store office and craft supplies as well as items I have listed for sale in my etsy shop.

18 office 2 (570x377)

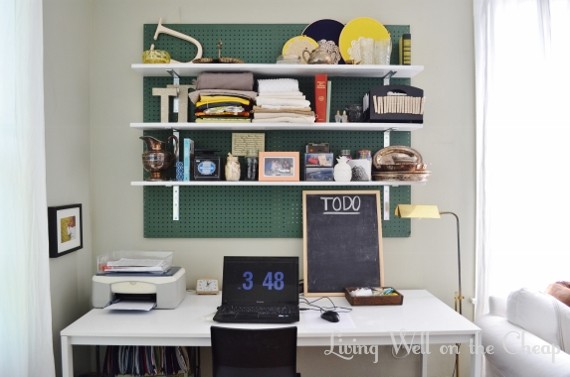
The rug is usually covered in baby toys.

19 ffice 3 (570x380)

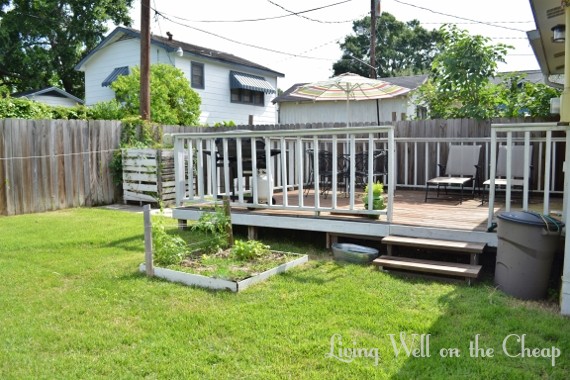
And last but not least, the backyard. The deck has become a much nicer place to spend time lately thanks to the fresh coat of paint and colorful umbrella I added to the table and chairs.

20 backyard 1 (570x380)

We have a vegetable garden, clothesline, two compost bins, and I’m working on putting in an herb garden (the grass is cleared, I just need to rent a tiller to get the rest of the roots and then build a raised bed. I learned from my veggie garden that just laying down some cardboard under the bed will not kill my grass.). That galvanized pail near the deck steps collects rainwater for me to water the garden with. I’d love to get chickens someday, but I’m worried about keeping them out of my veggies and herbs. And also predators. We live in a densely populated area with the standard assortment of stray cats plus a surprising number of possums, raccoons, and even a family of hawks. I’d like the chickens to be able to free range if I can figure out the logistics.

21 backyard 2 (570x380)

So there’s our place! Not pictured are the guest bedroom and master bath, which still leave quite a bit to be desired, but if you’re just dying to see what they look like you can check them out in this post and this post. I’ll be working on getting all these new photos up on the house tour page today, so if you click over before I’m finished you can see what’s changed (and what hasn’t!) since the last tour. I fell in love with the house the first time I saw it and it’s so cheesy but I love it a little more every time I do something else to make it more beautiful, functional, and livable. And if you’ve made it to the end of this super long post then I love you too! Thanks for reading!

Share

Those of you who have been reading since the beginning may remember that this is what my living room used to look like.

living 3 (570x428)

I’ve replaced the rug, switched around some of the furniture, and got about 90% through reupholstering those wing chairs (scored for cheap from craigslist right before we moved into this house). One of the chairs was complete, but the other still had some exposed staples and stuffing. No bueno, especially since my friend Cassie will be sitting here to open gifts at her baby shower tomorrow. For my sister’s shower I just decorated the arms with fabric bows to hide the staples. Talk about lipstick on a pig! Since I have more people helping host this shower and a cleaning lady tackling my bathroom as we speak I knew I had no excuse not to do something about this chair.

013 (380x570)

Step number one: dig the arm-cover thingies out of my crap pile and pry the staples out of the back to remove the fabric.

016 (380x570)

With the fabric free, I used it as a template to trace onto the new fabric (which is actually canvas dropcloth that I dyed a light gray).

022 (380x570)

Then I just cut along the lines and stapled each piece around the spiky arm-cover contraption.

026 (570x380)

Bam.

These things are supposed to have piping around the edges, and lucky for me I discovered some piping in my crap pile that I’d apparently already made at some point in the past (using this technique).

030 (570x379)

Because I am in the running to win seamstress of the year, I attached the piping with HOT GLUE. Oh yes I did.

034 (380x570)

And because those little spikes never line up properly with the holes they were originally stuck into, I hammered them flat and attached my little cover thingies to the chair with, you guessed it, hot glue again. High quality upholstery work happening over here.

I cleaned up the fabric around the back with some staples so that the stuffing is no longer poking out and called it a day. I’ll be honest, this is not my best work. The new pieces don’t lay flat and the fabric has not faded the same way as the stuff that’s been on the chair for over a year and I guess I might as well go ahead and admit that the back of that chair is completely open-exposed springs and all. It’s in a corner so nobody will see it and I am COMPLETELY OVER these chairs. I spent all this time and effort reupholstering them and now I want to replace them! Yeah, not gonna happen anytime soon. Crappy or not, I’m happy to finally have these chairs crossed off my to-do list.

Share