Various versions of yarn ball mobiles are all over Etsy and Pinterest these days, and I wanted one. And of course, suffering as I do from Icanmakethat syndrome (a very real thing) I decided to try my hand at making one myself instead of coughing up the cash to buy one ready-made. I couldn’t find any really detailed tutorials online so I had to just figure it out as I went. Read on to see what I did.
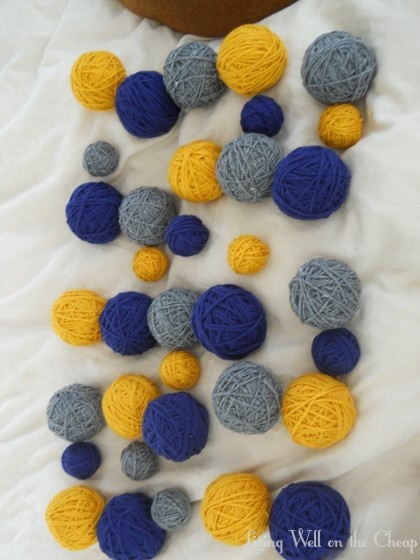
Before we left for Destin last weekend I gathered my supplies: 24 2.5″ foam balls, 12 .75″ balls, yellow and gray yarn I already had, navy yarn I bought for this project, and a 7″ embroidery hoop. I also ended up needing straight pins, hot glue, fishing line (or “monofilament” if you talk like Martha Stewart), a key ring, and a crochet hook, but most of that didn’t come up until later.
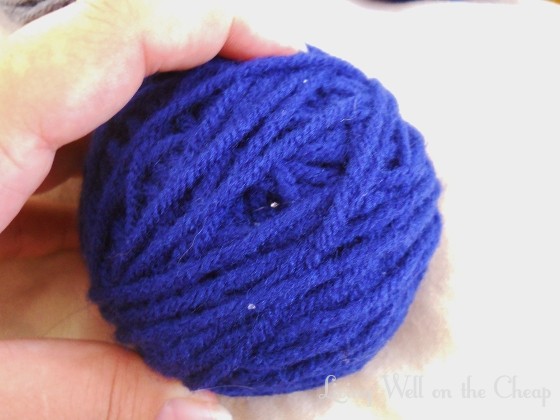
For our trip, I packed the yarn, foam balls, scissors, and a pincushion full of straight pins. I got all of my balls wrapped in yarn in just a few hours in the car. It was actually a very relaxing activity. Interstate driving makes me a little nervous if I’m not behind the wheel, so it’s better that I have something to focus on besides critiquing Nick’s following distance.
I used straight pins instead of glue to secure the yarn because it was neater in the car, but you could go either way. I realized pretty quickly that the only pins I even really needed to use were at the very end, but it was best to use at least two at that crucial point.
Back from the beach, I sat down one afternoon after work this week to turn all those yarn-wrapped balls into an awesome mobile. Step one: line them up into five columns. I just kind of played around with it until the arrangement looked right.
With the order of things figured out, it was time to start threading those balls. I hadn’t really thought about this step ahead of time so I had to get creative. Ideally, I would have used a really long needle, but I didn’t have any nearly big enough on hand. I decided to use a small crochet hook instead. First I stabbed my hook through the center of the ball.
I bought some of that invisible craft string at Hobby Lobby YEARS ago for some other project and have used it so many times since. I know I’ll run out of it sooner or later but for now it seems to be an infinite resource. I cut a long piece, then looped it onto the hook and pulled it back through the ball.
I tied the other end around a straight pin and stuck it back into the ball just a smidge over from the big hole made by the crochet hook, securing the ball onto the line.
After that, I just used the crochet hook to thread the rest of the balls onto the line. I didn’t worry about spacing them out at this point, I just let them stack on top of each other.
Once I figured out my technique it only took me about five minutes per strand. With all five strands completed I brought them into the office for assembly. I looked at some inspiration pictures online and decided to make each one 24″ long. So I laid each strand down on the floor alongside the tape measure and spread everything out until I liked the way it looked.
Then, I secured each ball in its place on the line with a dab of hot glue.
I’d already painted the embroidery hoop green the other day using leftover paint from my sewing desk. The point of the hoop is to make the strands spread out from each other a bit when hanging.
I separated the two concentric rings of the hoop and started securing each strand to the inner ring with hot glue, leaving about 6″ between the hoop and the first ball. I later decided the whole operation was too tall so I went back and scraped off the glue so I could push the hoop down lower, but then the strands got all tangled up and I regretted it.
Juliet saw the tape measure on the floor for what it was: a golden opportunity to finally get an accurate nose-to-tail measurement. She is officially 27″ long.
Once I had all five strings attached to the hoop, I put the outer ring back on and then threaded them all through a small foam ball with the crochet hook. I noticed in lots of the inspiration images I saw online that something like this was used to bring all the strings together again before they were attached to the ceiling. In retrospect I don’t think it makes much difference. I could have just tied the strands directly to the ring they eventually hang from and skipped the yarn ball entirely.
See what I mean about ball and hoop working together to bring the strings together and then spread them out evenly?
Above the small gray ball, I gathered all five strands together and tied them around a key ring. I have a whole box of these because I use them to hang curtains, but you could always just steal one from a keychain you didn’t want anymore. This isn’t the knot that I ended up using. I decided I wanted it to be shorter, so I undid this knot and tied another one lower down and then secured it with some hot glue.
Ta-da! I love it.
This project was pretty straightforward until I tried to adjust the height, so if you’re trying this at home I recommend planning that out ahead of time a little better than I did. Or you could just buy one on etsy like a normal person, haha. Despite the tangled mess I had on my hands towards the end, it all turned out exactly as I’d pictured it. We just hung it up from a regular ‘ol ceiling hook (the same kind I use to hold my hanging plants on the front porch) and thankfully we’ve got a few weeks to see if it falls down before there’s a baby sleeping there.
Since I had a lot of supplies for this project already on hand, I probably ended up spending only about $25. The foam balls were by far the most expensive part. And I’m not gonna lie-there were moments when I would have been willing to spend twice that much just to have it done (mostly in that awkward period when I was trying to adjust length and it got all tangled). But in the end, I love the way it looks and it really wasn’t too bad. One more nursery item checked off my list! How exciting!


Those are my favorite colors! It came out so good I almost want a mobile above my bed, haha!
Hahaha I know I kind of want one too!
This looks like such a fun project! I love it! I love things that I can do in the car on long trips.
I loved it so much that I think I’m going to start planning a project to bring on every long car trip. I know Nick definitely appreciated that I was distracted!